Adding new invoices
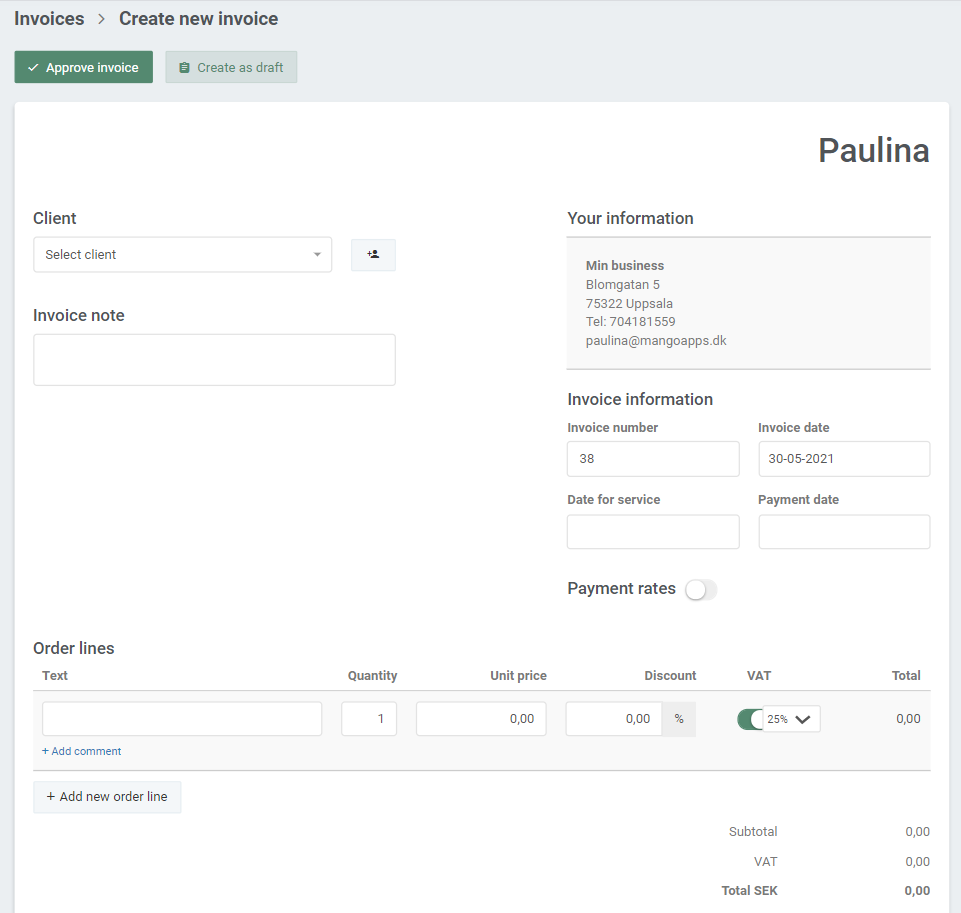
To add a new invoice, go to ‘Invoices’ in the menu bar and click on Create new invoice. You can also click on a booking directly in your calendar, and then choose ‘Create new invoice’. The booking information will then be automatically applied to your invoice.
In the next step, you will be able to edit and add all necessary information about your new invoice. Note that all information will be visible to your client when they open the invoice.

Edit invoice information
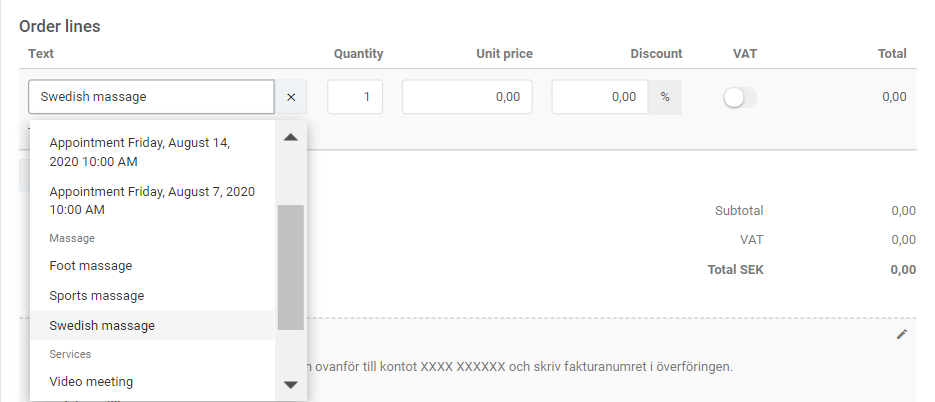
Begin by choosing which client you will send the invoice to in the Select client field. Then click on the field under ‘Order lines’ to choose which appointment the invoice is related to, or which service you would like to charge for:

The price of the service will automatically show in your invoice, but you can always edit the price and VAT rate as you go. To add a second order line (service) to your invoice, click on Add new order line and choose, again, which service or appointment to charge for.
Finally, choose the Date for service and Payment date of your invoice. The Payment date will set the due date for your client’s payment.

Edit your personal information
The content under Your information is the same as in your Profile settings. To edit the information, go to ‘Settings’ in the menu bar and choose ‘Your profile’. Here, you can add the information that you want to show in your invoices and in your Online Booking.
View the status of your invoice
If you click on an appointment in your calendar, you will immediately see if the appointment has been invoiced or not:

A small icon on the appointment in your calendar will also show you the status of the payment.
The check-mark means that your invoice has been paid:

The invoice icon means that your invoice has been sent out, but not yet been paid:
