
Most therapists today have their own websites to describe their profile and offer their services. This is because most customers today find their therapist or doctor online and therefore a well-thought-out online presence is more important than ever. We are also aware that customization contributes a lot to stand out from the crowd.
That is also the reason why today’s blog post is about the possibilities with which you can customize your online booking and thus convey your very personal touch to your customers when booking an appointment.
In detail with EasyPractice, you can integrate your online booking into your webpage, customize appearance and design, color, and set up a client login if required.
Let’s dive right in, shall we?
Change the color of your online booking
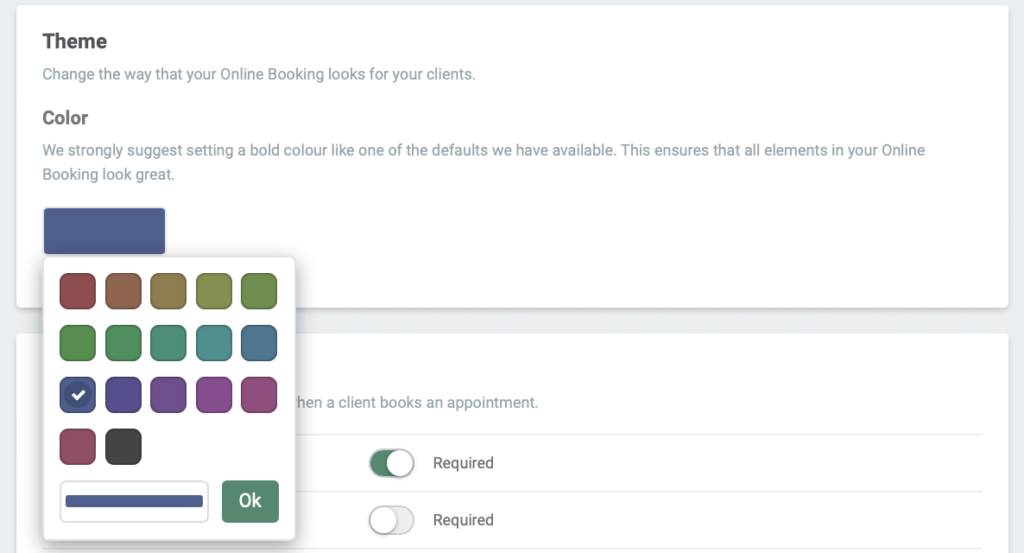
Different websites mean different color themes and that’s why we have the possibility to customize the color of the online booking as well. This means that if, for example, a therapist uses blue color as the main design on his website, he can also change his online booking to blue color. Of course, this also works with other colors. Many therapists appreciate the ability to set a consistent color theme online.
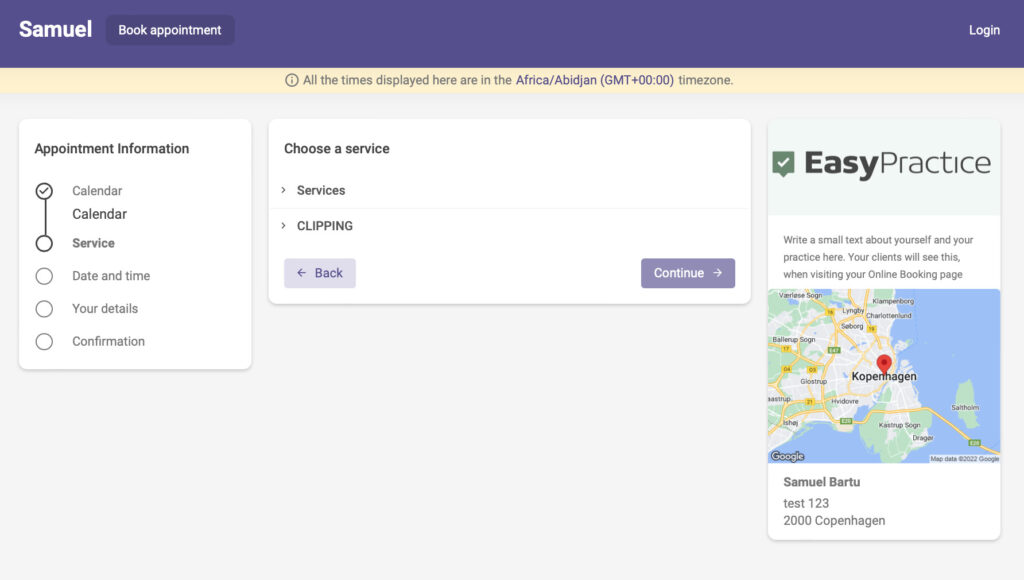
You can simply change the color of your online booking to one of our designs or select a custom color for your branding or website. This is done by going under ‘Settings’ -> ‘Online Booking’ -> ‘Appearance’. Then click on the current color, which is the default green color. We also have a detailed guide on this topic in our Help centre.
With my online booking, you can see what it could look like.
Linking the Online Booking to your website
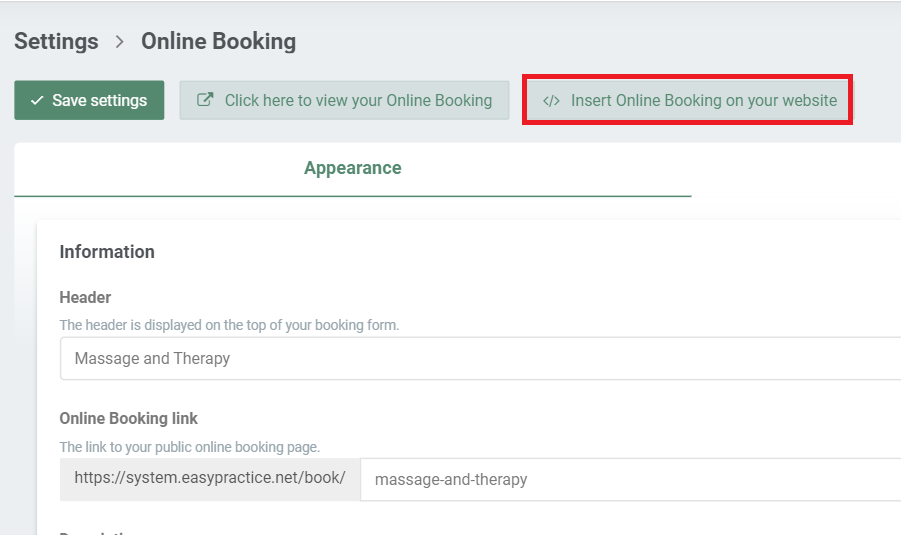
Another way to personalize your online booking is to integrate it into your website. This is how you improve the customer experience on your website and make it easy for your customers to book an appointment with you quickly and easily. That’s why we offer three ways to link your Online Booking form to your website:
- Add a link.
- Add a pop-up.
- Build in the Online Booking form to your website.
The explanation of the individual possibilities would go beyond the scope of this blog post. Nevertheless, we find it important to name these possibilities and introduce them to you. All of these options will be explained in the following guide and associated videos.
Manage the ‘Client Login’ functionality
One of the main features of EasyPractice is “Client Login.” It enables your clients to sign in to their individual client profile page, where they can do a lot of things like schedule a new appointment, sign up for events, receive encrypted messages or files from you, and much more. With a secure login procedure, you may ensure that the function is a secure way to manage your clients’ private information.
Other steps in the booking process, such as canceling appointments or using coupons, are automated via Client Login. This will save you and your customers both important time if you offer regularly occurring events or classes with a number of participants.
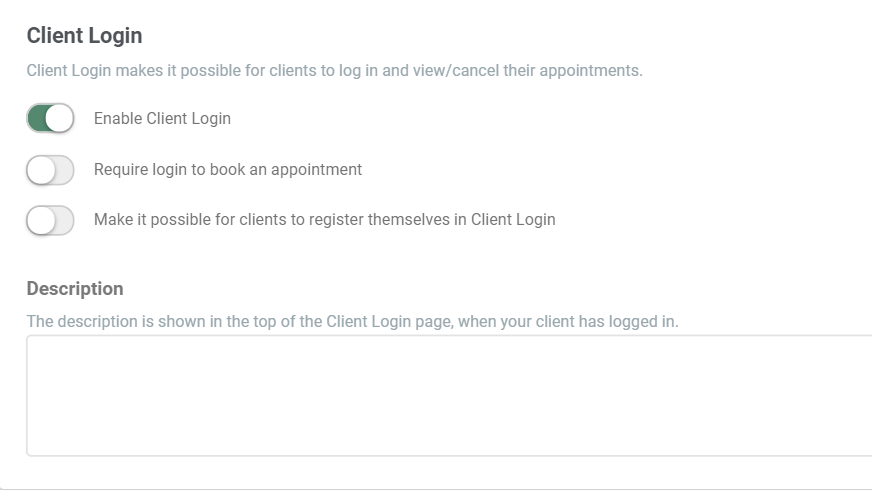
Client login appears in your online booking form. When one of your clients has a client login, they can book or cancel an appointment all by themselves. You can choose to have a client login as an option, required, or even unavailable when booking an appointment in your practice. You can fix that in the ‘Settings’ section under ‘Client Login’. We also have a detailed guide on this topic in our Help centre.
Customize your online booking appearance and design
Regarding the look and feel of your online booking, you have a variety of options. You can, for instance, add a logo to your online booking, select the order in which reservations are processed, and include a map indicating your location. The majority of these options are located in “Settings” -> “Online Booking” -> “Appearance.” We also have a detailed guide on this topic in our Help centre.
Information about you and your clinic
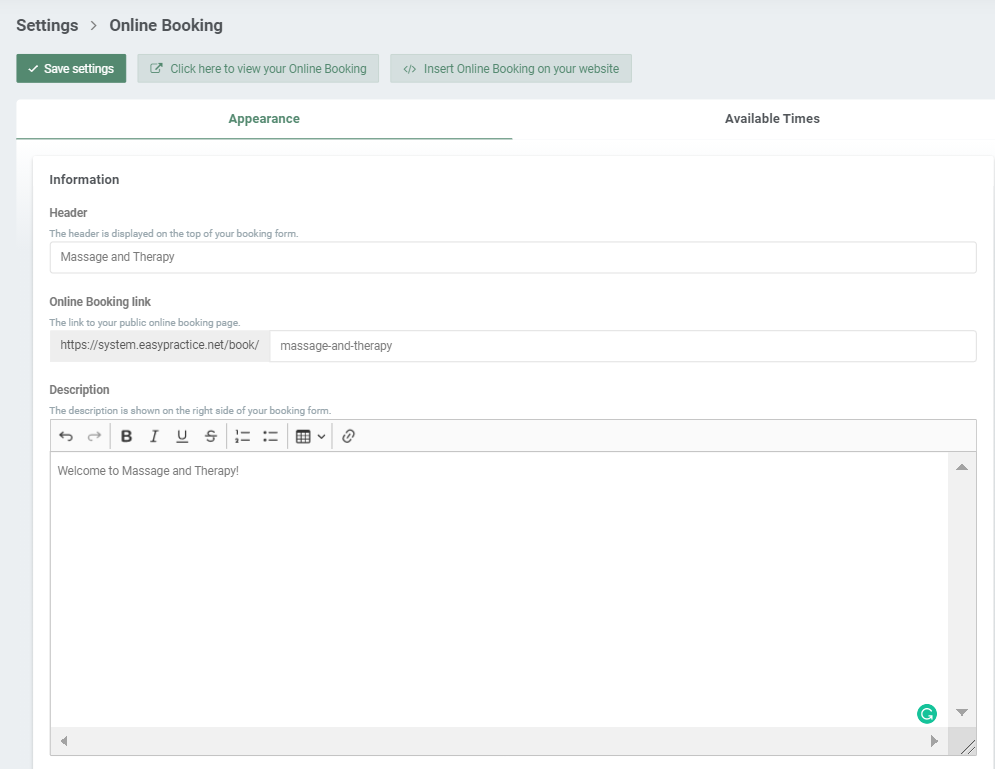
You can change the details displayed in your online booking in the Appearance menu. Select a header, change the link’s URL to reflect your company, and include a description of your services.
Use an image of your logo or practice
You can also add an image or logo to your Online Booking. I am quite sure that you have a good photo of your logo, practice, or service somewhere on your hard drive. Use this to add a little more personality to your customers’ online booking experience. It is important to say here that you can do it, but of course, you don’t have to.
Sum up
I hope I was able to show you with this post how many options there are with which you can personalize your online booking according to your preferences. I think there is something for everyone and maybe you’ve learned something new too 😉
Please do not hesitate to email us at [email protected] if you have any questions or require assistance with anything. We anticipate hearing from you.
Visit our Help Centre for thorough explanations if you already have an account here, and check out our other Blog posts for intriguing tips and articles if you’re not sure how some things function.
 alt tab and computer
  alt Online scheduling
  alt Create special Vouchers for your services