We are back and this time with a guide to useful tables or charts in journal settings to improve your Online Booking.
If you want to create a journal entry in which you would like to insert a table or chart, you can use table properties to create an easily accessible template that can be added into any journal entry.
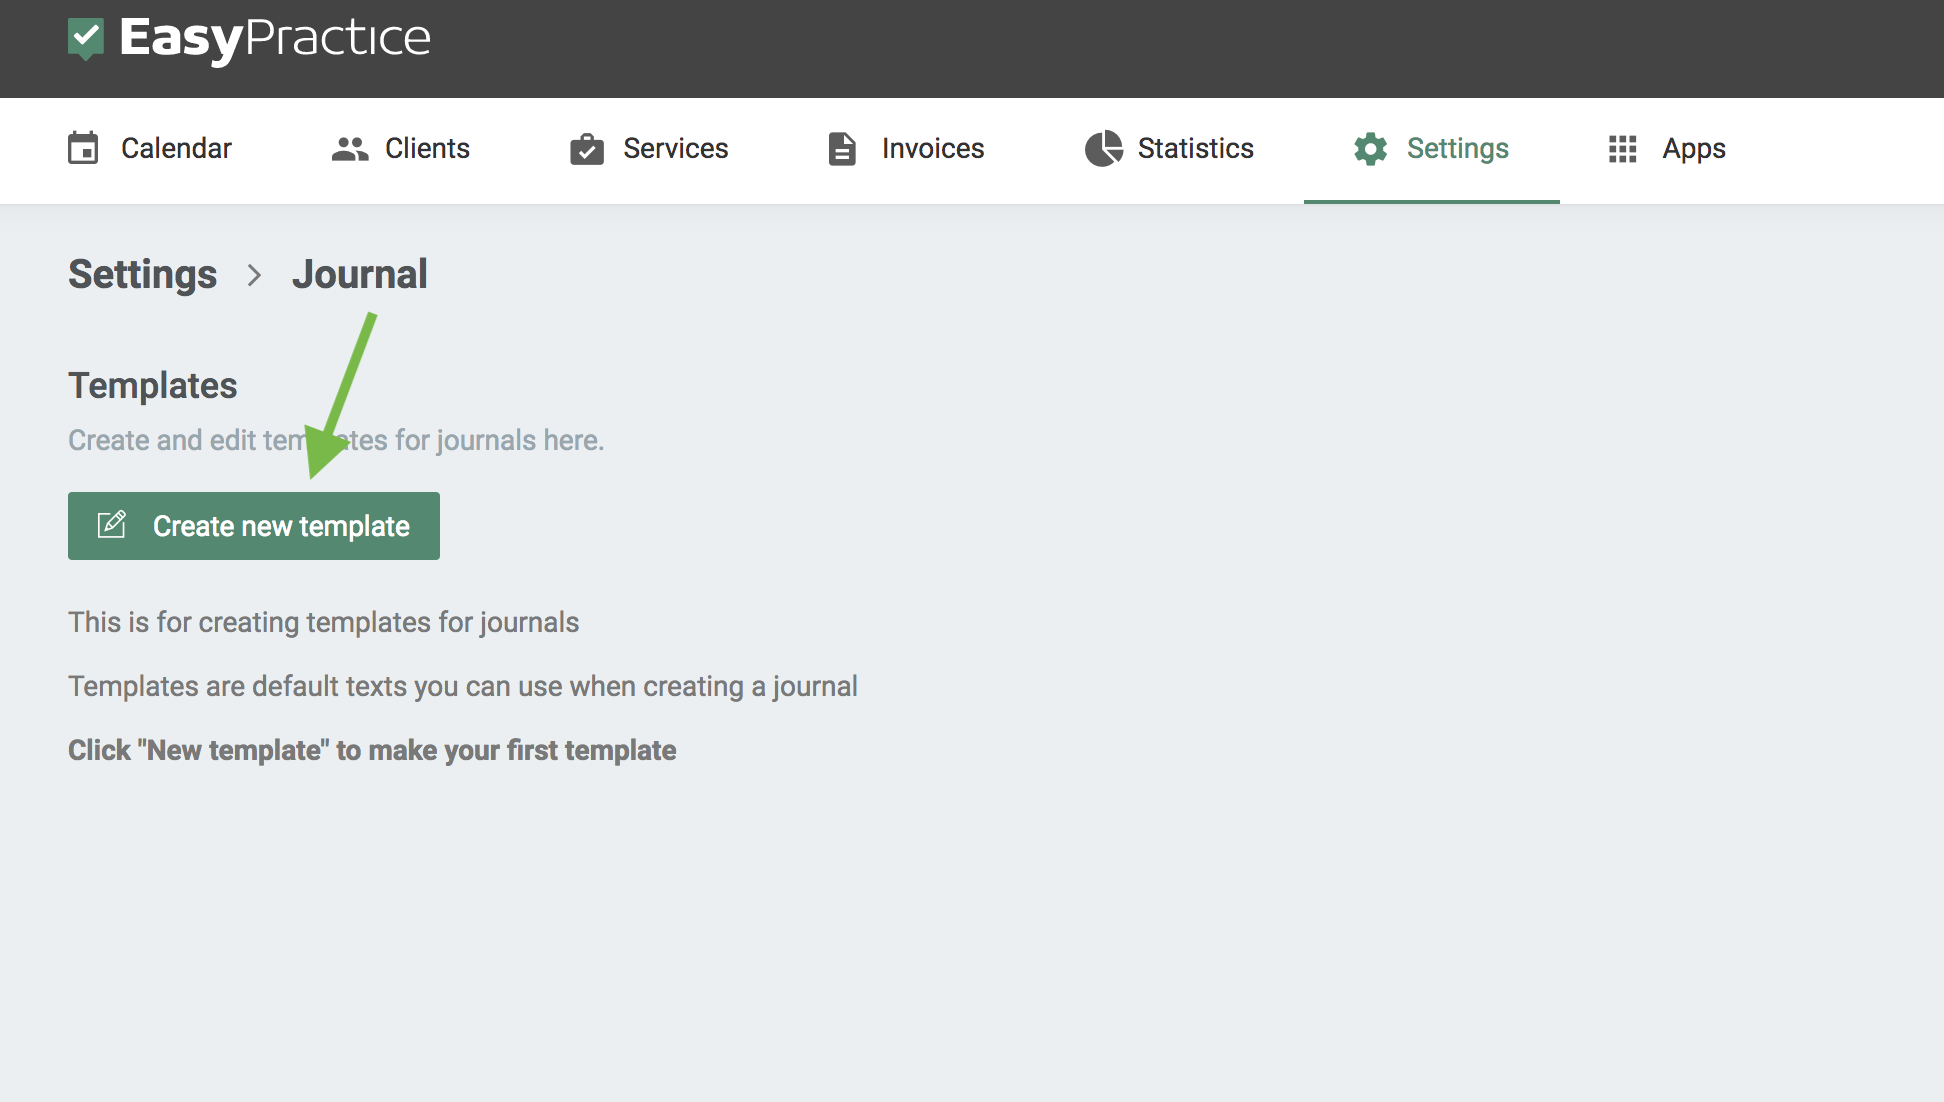
You start clicking on “Settings” -> “Journal” and then the green box saying “Create new template”, as shown below.
Step 1
Step 2
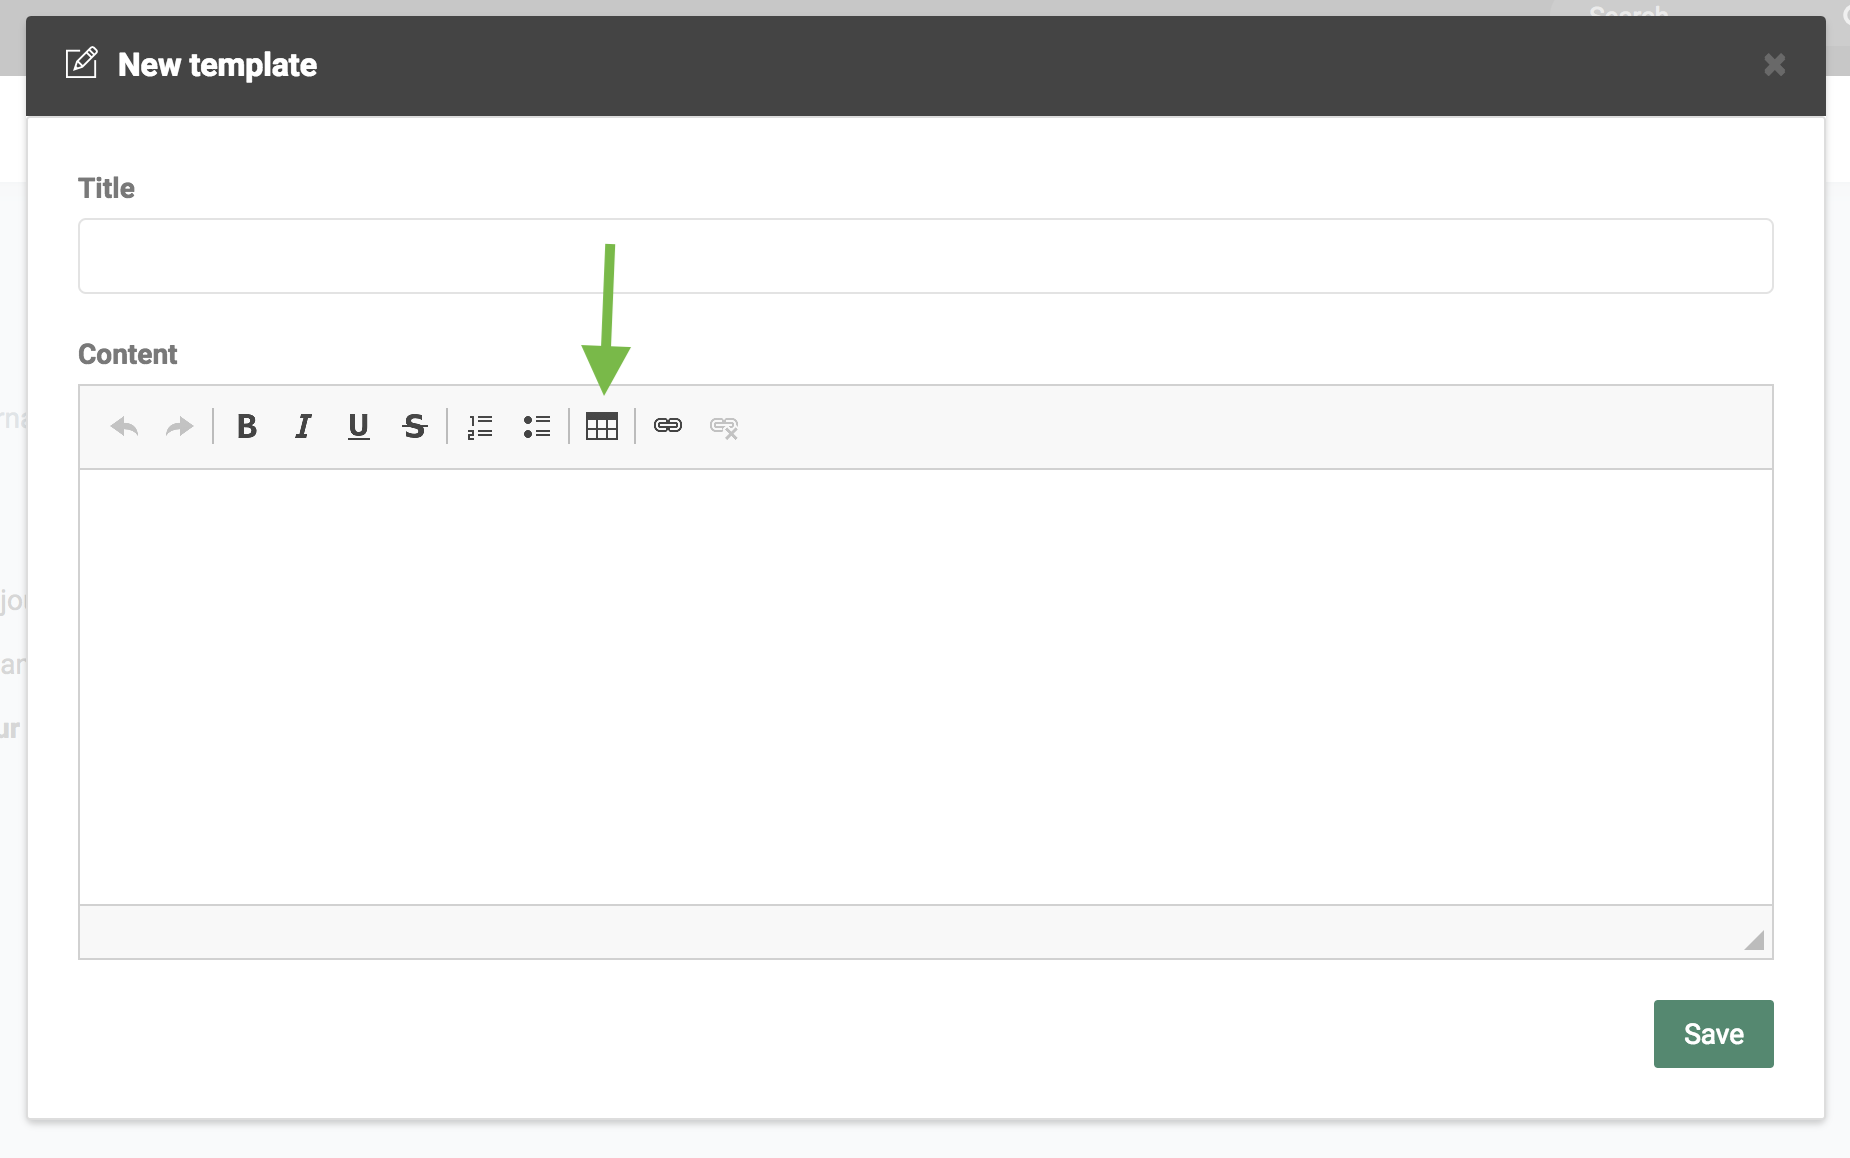
Then you click on the table icon under in the Content menu.
Step 3
Then a table properties box will pop up.
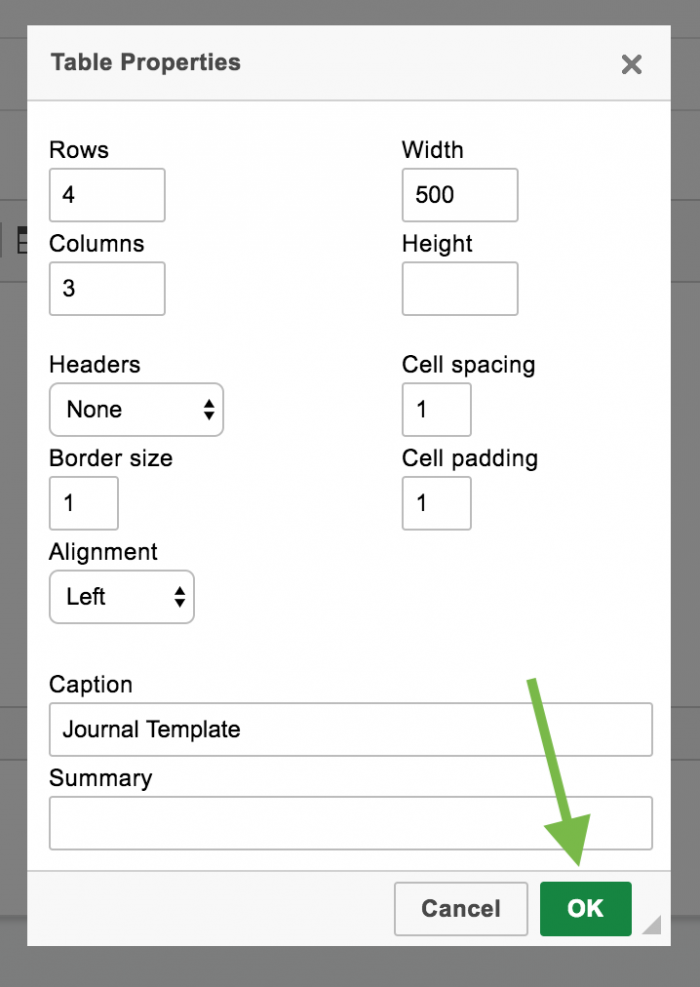
In this example I have chosen to create a template with 4 rows with a width of 500 and 3 columns with a default height (left empty). If you need space for more text, you can easily add the desired height in the box.
I have chosen not to fill in the Headers box, but this option can be useful if you wish to make the first row and/or first column as the title/heading.
The cell spacing, padding, and the border size is automatically sat to be 1, but you can change this as you wish.
Alignment is used to decide where on the page the template is inserted. Here, I have chosen to the left.
The caption box can be used to add a small heading above the template itself. Lastly, we have the summary box, which is left empty, as it does not have any function. (I have asked a developer to remove this box so it does not confuse anyone)
Step 4
Finally, you click on “OK” and then your custom designed journal template should appear.
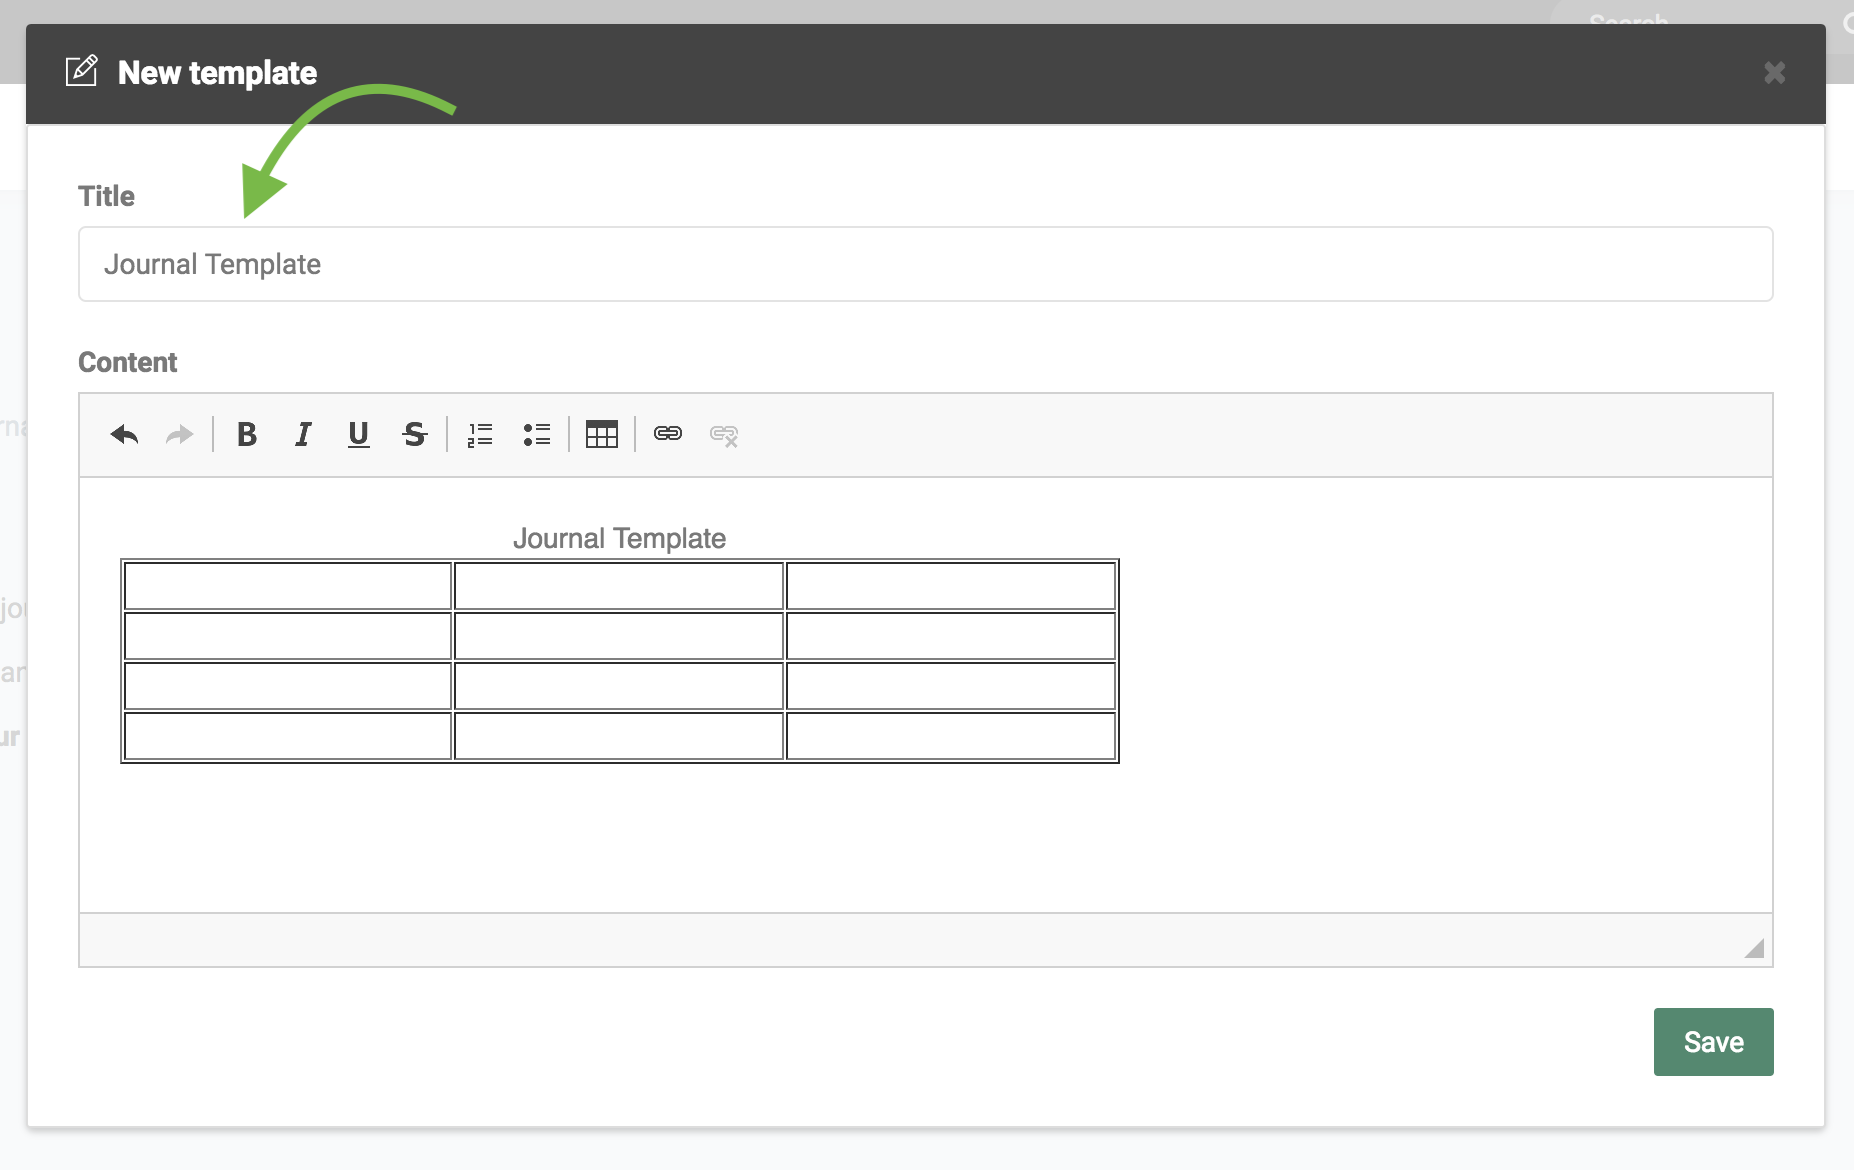
Before saving, please remember to name the template. ☝️
Step 6
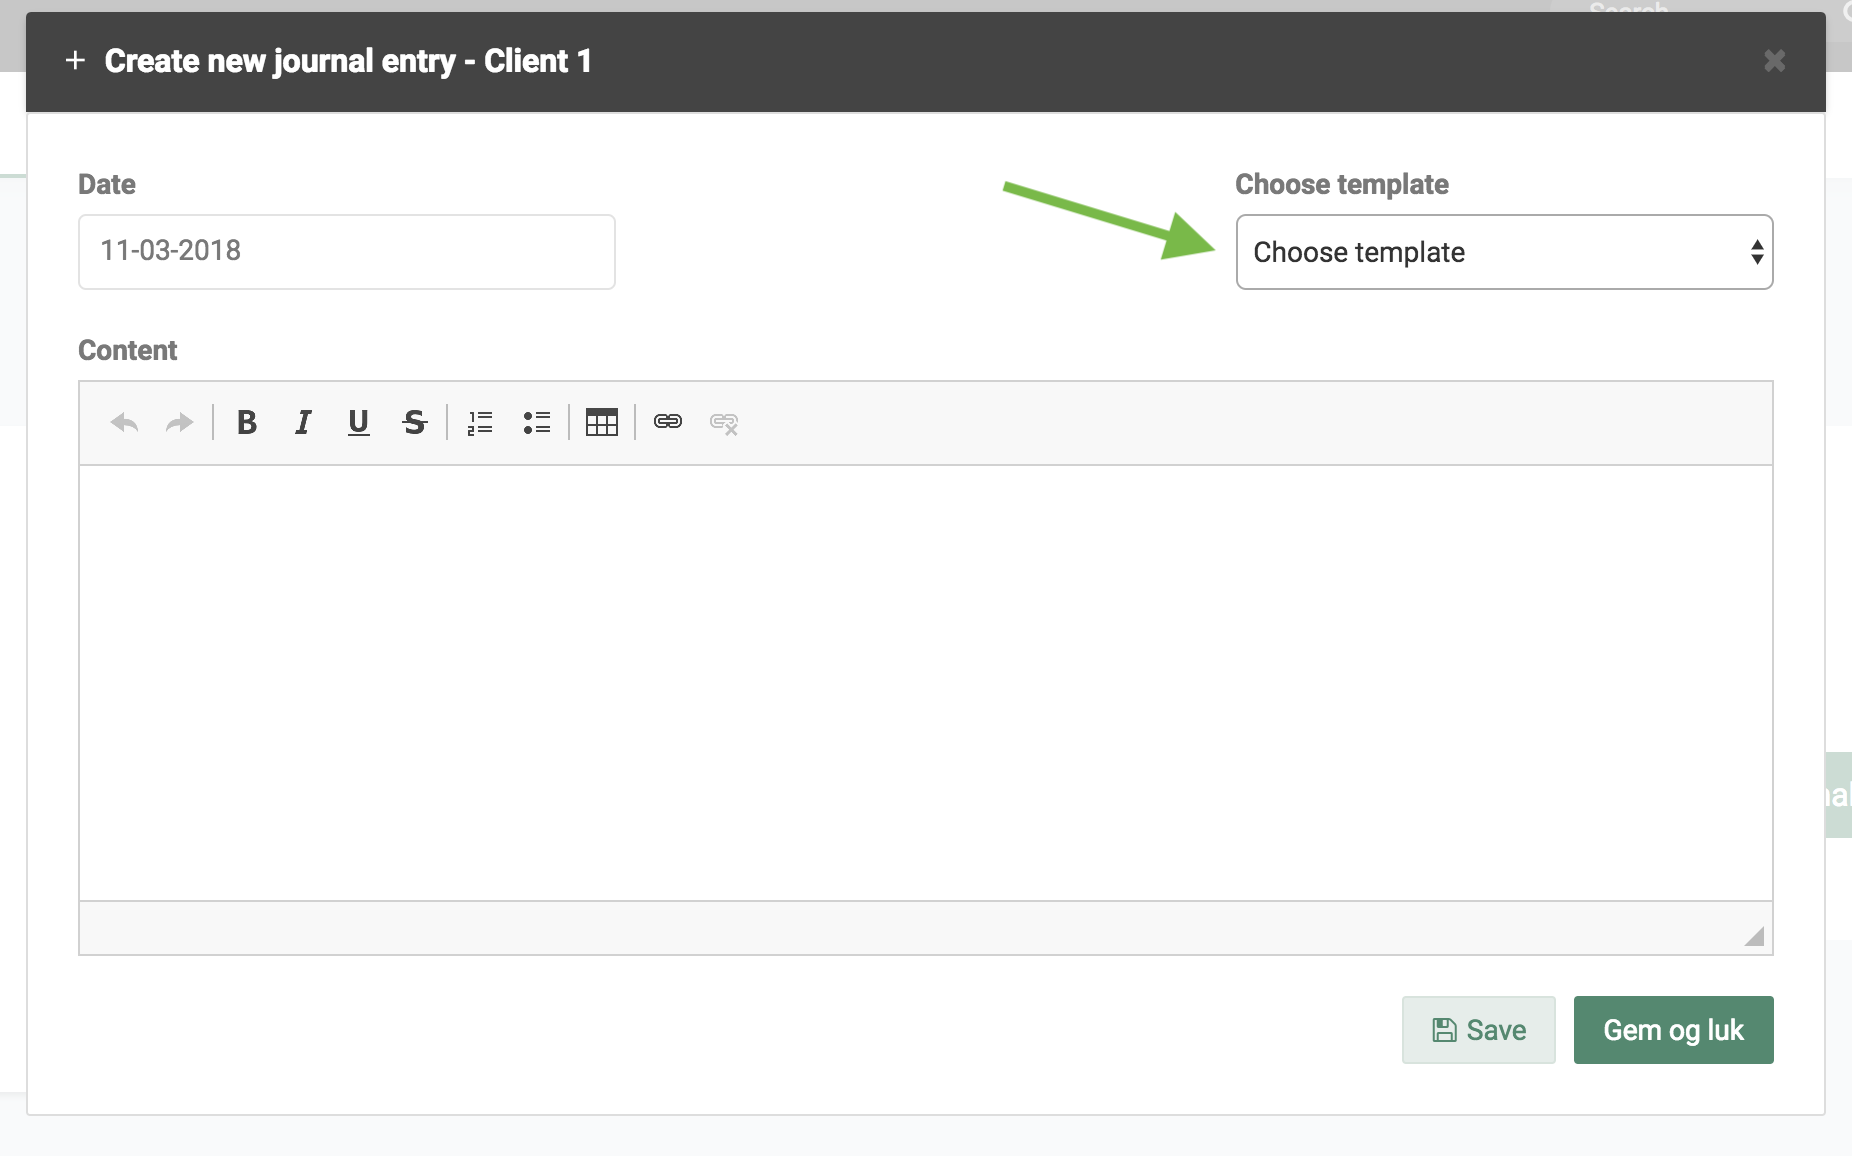
Now, if you go to the client page and click on “Create new journal entry,”at the upper right hand corner you can add your newly created template to the journal entry.
In our Help Centre we have a whole section dealing with Journals.
If you have any questions or comments, please get in touch at [email protected] and we’ll get right back to you! ? If you wish to try out our booking system free of charge to see if it works for you!

 alt tab and computer
  alt Online scheduling
  alt Create special Vouchers for your services