
With EasyPractice, you can decide whether your clients should log in before they book an appointment with you. If you have regular clients, it makes it easier for them to log in so that they do not have to input their details every time they want to book an appointment. Alternatively, if you are expecting one-off clients to book an appointment (maybe you have a trial event that you expect new people to sign up for), it makes sense for you not to require a log in from them. However, if your business is happily growing and you’re always getting new clients, of course, you will want them to be able to sign up in the easiest way possible. This is where Facebook login steps in. ?
For your clients who use Facebook, they can log in with just two clicks. It really is that simple.
How to install Facebook Login:
Just go to Apps, scroll down to ‘Online Booking‘ and click ‘Activate’ for Facebook Login. Then, your clients will see this when they go to log in to book an appointment:
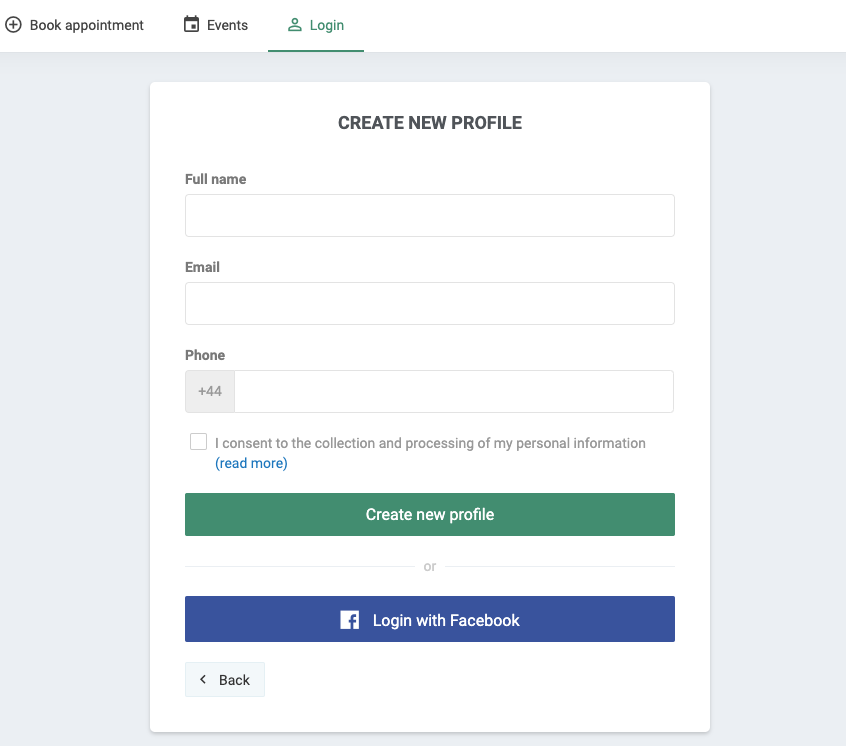
Of course, they can choose to create a profile with their name and email address instead. But we know you’re always looking to make booking with you easier for your clients. ?
Guide to adding a link to your Facebook page:
1. First go to the Facebook page itself. Below it is shown what it will look like
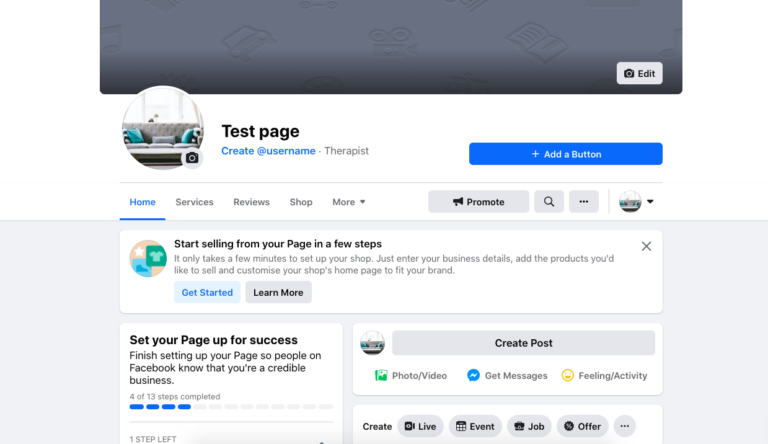
2. While you are on your page, press “Add a button”. Then you will have the following choices:
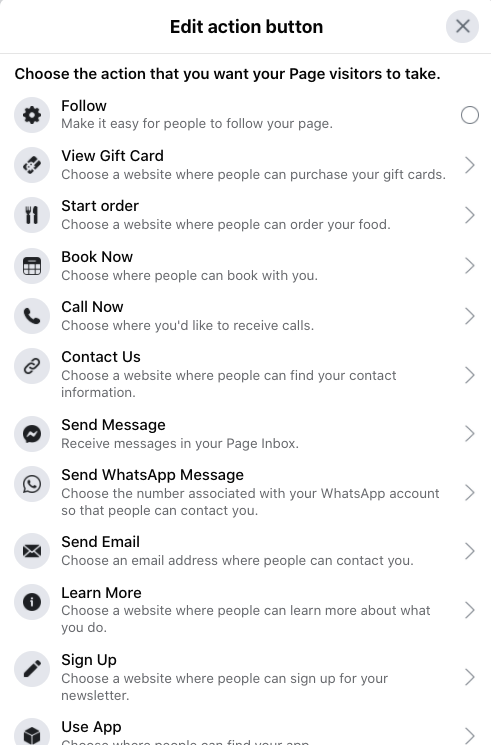
Here it is worth noting that there are many different options, and it can therefore be difficult to figure out exactly what to choose. There is an option to use the “Book Now” button which will direct you to a number of different websites but the simplest way is to select the “Sign Up” button where you can add a URL link to any website.
3. Select “Sign Up”.

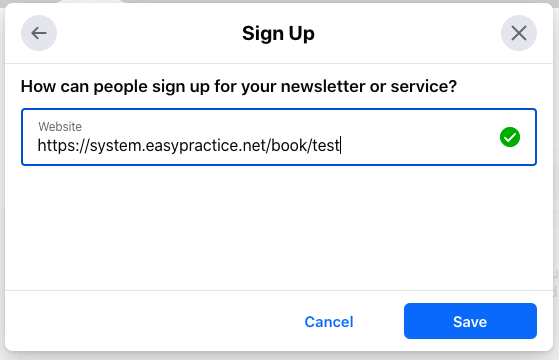
Here you get the opportunity to insert a link to your booking page, directly on your Facebook page. Shown below:
Find the link to your Online Booking
The actual link to your Online Booking can be found under your profile on EasyPractice. You do this by clicking on Settings -> Online Booking -> Online Booking link. Then copy your personal link and paste it into Facebook. Remember to include the name of your practice in the box to the right.
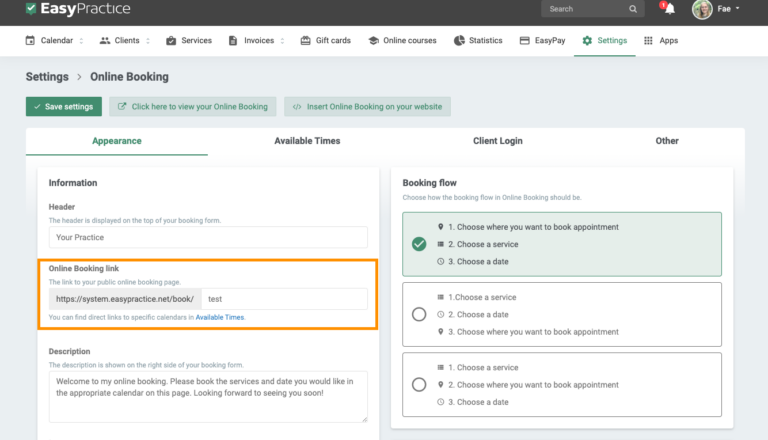
4. As soon as you have inserted your Online Booking link, press “Save.” You will now have the opportunity to test your button to ensure that everything is as it should be.
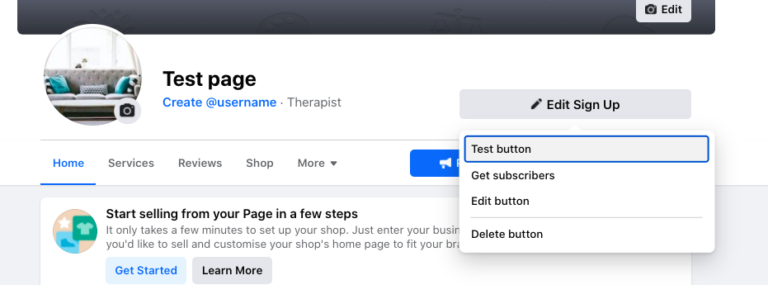
When you press “Test button”, you will be taken directly to your Online Booking page, and your clients will do the same. If they are not logged in or do not have a user, they will be asked to log in or create a new profile before accessing your booking page.
Now you can wait for clients to start booking at your clinic through Facebook. The easier it is for your clients, the easier it is for you too!
I hope these tips and ideas are helpful for you at your practice!
In our Help Centre we have a lot of other useful and interesting guides.
If you have any questions or comments, please get in touch at [email protected] and we’ll get right back to you! ? If you wish to try out our booking system free of charge to see if it works for you!
 alt tab and computer
  alt Online scheduling
  alt Create special Vouchers for your services